Complete Guide to building a Gemini AI Chatbot on iOS using Firebase API Extension
Watch the video or follow along with the post below.
Previously we’ve seen how to use the Gemini AI Swift SDK to chat with the LLM using text-based requests. Google has recently rolled out a Firebase extension that gives you another way of working with Gemini API but through Firebase. The advantage of this extension is that if you are familiar with Firebase, you can build a chatbot on iOS very quickly. With some configuration which is pretty straight-forward, making requests to Gemini is a breeze. So let’s get to it! Head on over to https://firebase.google.com and sign in with your Google account.
- Select
Go to Console

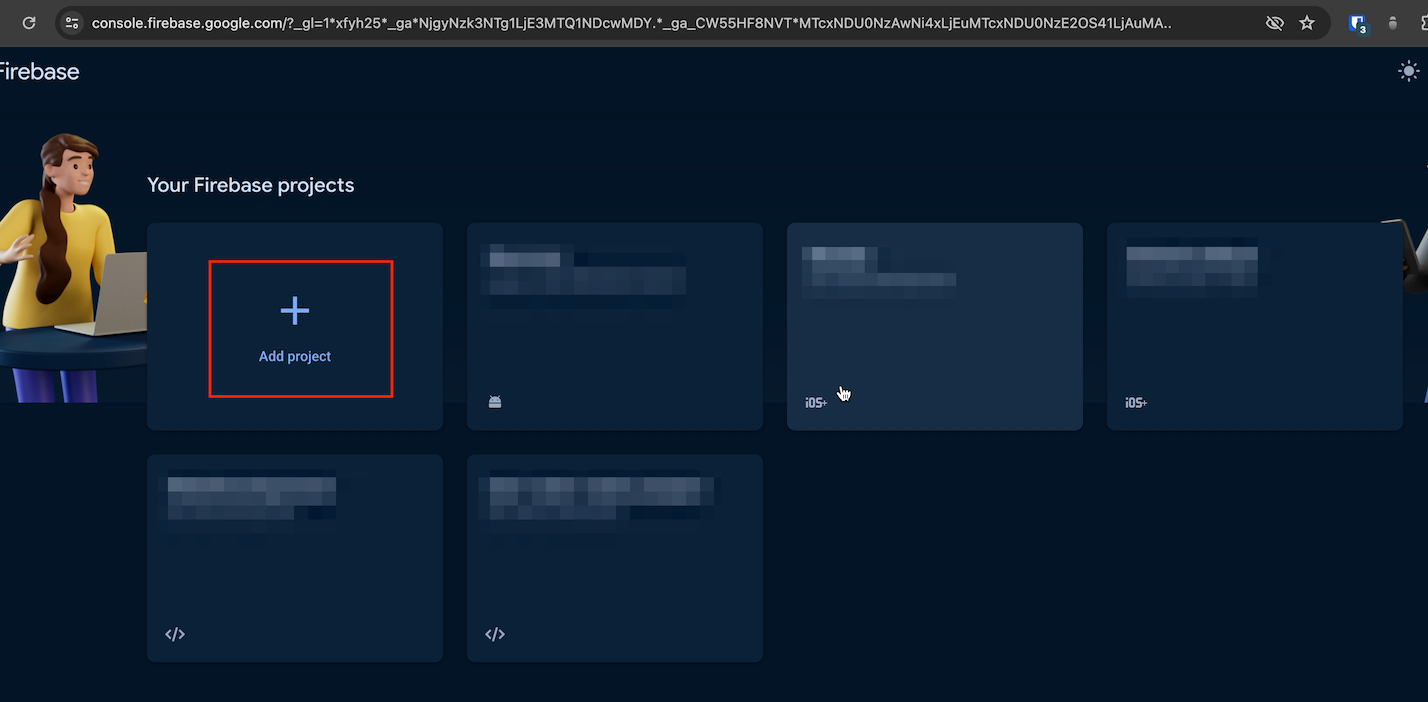
- Select an existing iOS+ project. If you don’t have one, select
Add Project
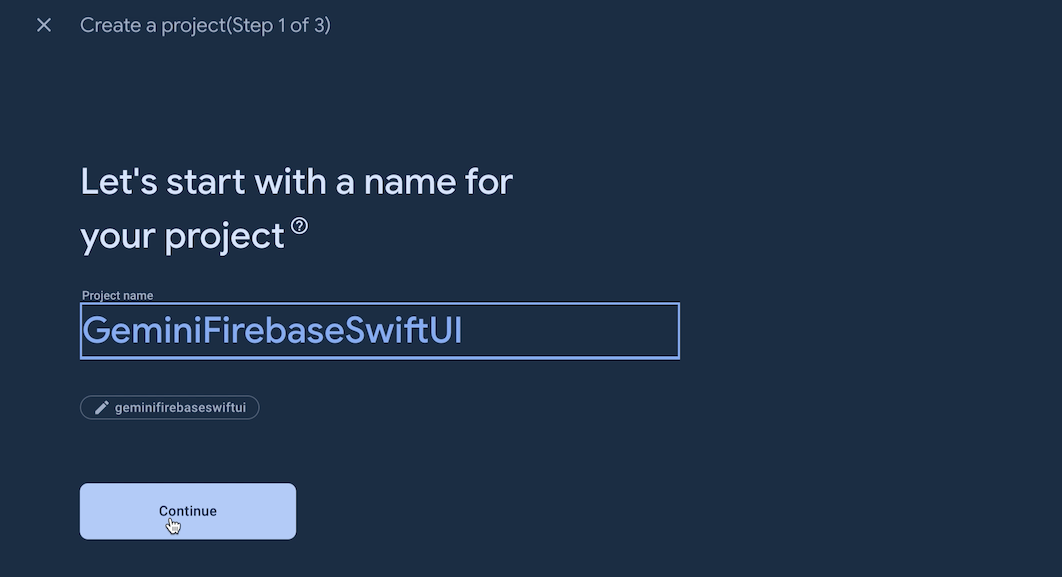
- Give your project a name & hit
Continue
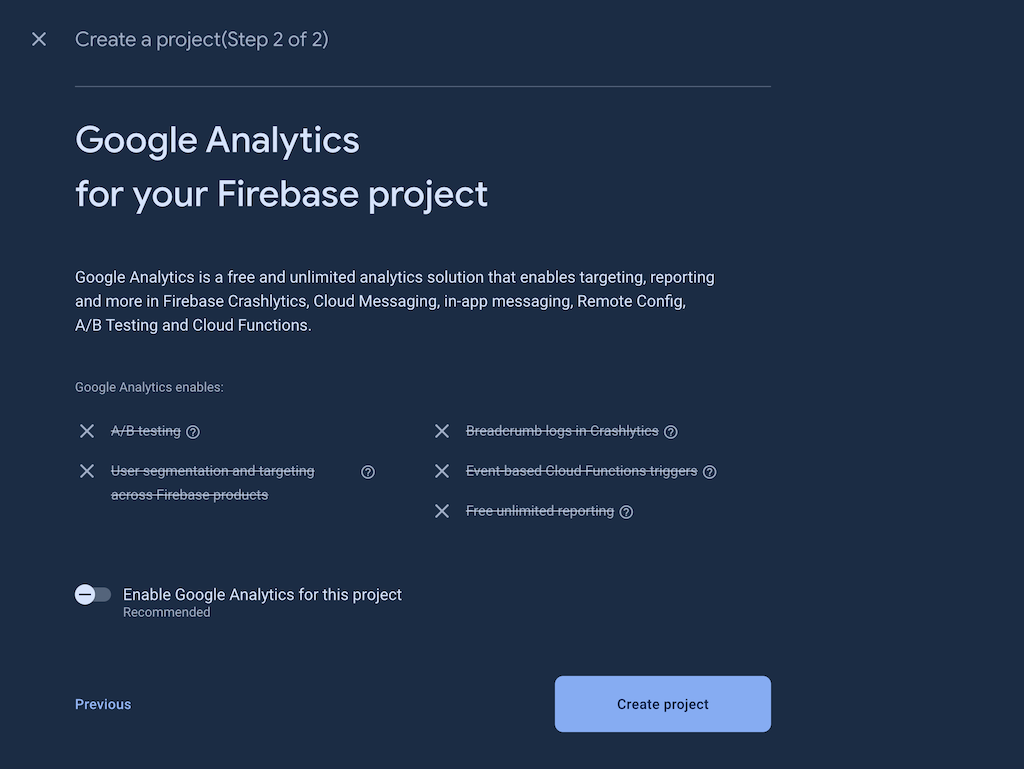
- The next step will recommend that you enable Google Analytics for your project. It is not required, so you can turn off the toggle & select
Create Project. Wait a while as the project is created. If you do choose to enable Google Analytics, you will be asked to select a Google Analytics account in the next step before you create the project.
- You will now see the project overview panel. Select the
iOS+option to create an Apple app in Firebase. The next few steps should be familiar to you if you’ve worked with Firebase on iOS before.

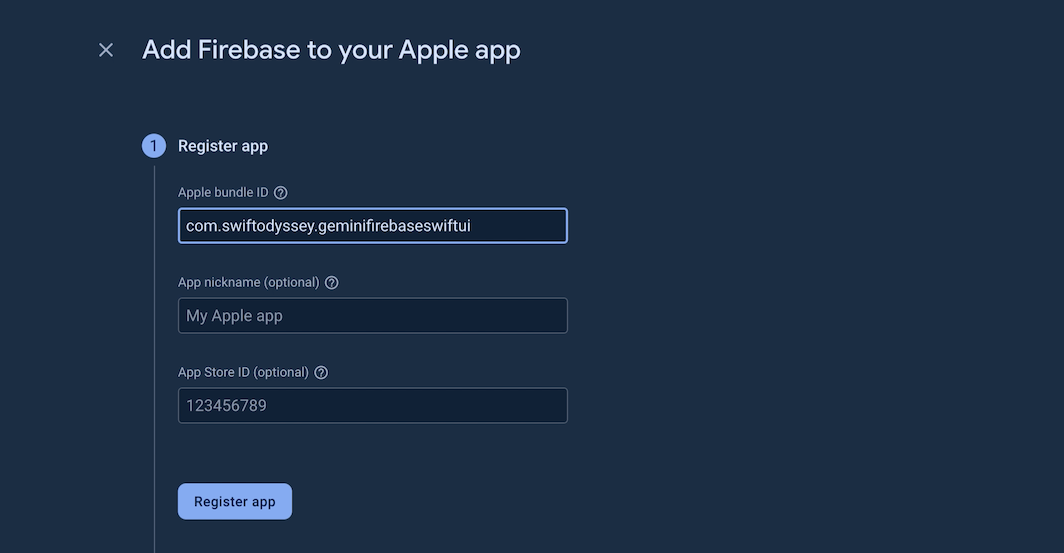
- Add a bundle id and note it down somewhere to create an Xcode project with the same bundle id later. Select
Register app
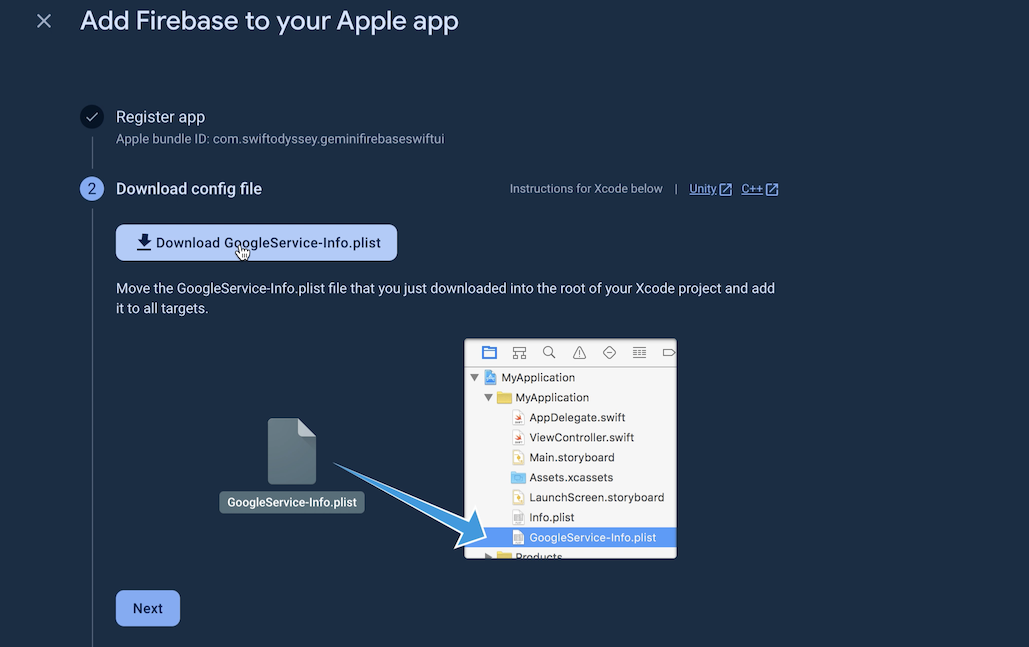
- Download the
GoogleService-Info.plistfile on your system. SelectNext
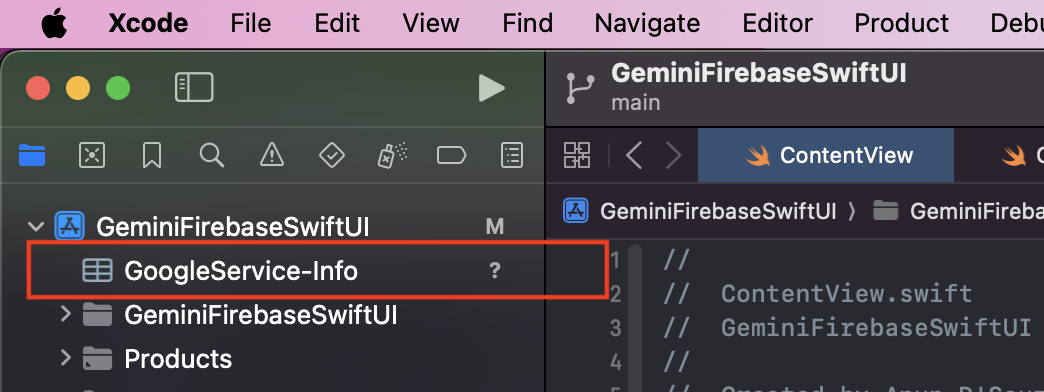
- Open Xcode & create a new project in SwiftUI. Drag & drop the
GoogleService-Info.plistyou downloaded in the previous step into your Xcode project.
- While still in Xcode, go to
File > Add Package Dependencies...to add the Firebase SDK.

- Enter the following url in the package search bar
https://github.com/firebase/firebase-ios-sdk& selectAdd Package.

- Go back to the Firebase console to
Add initialisation code
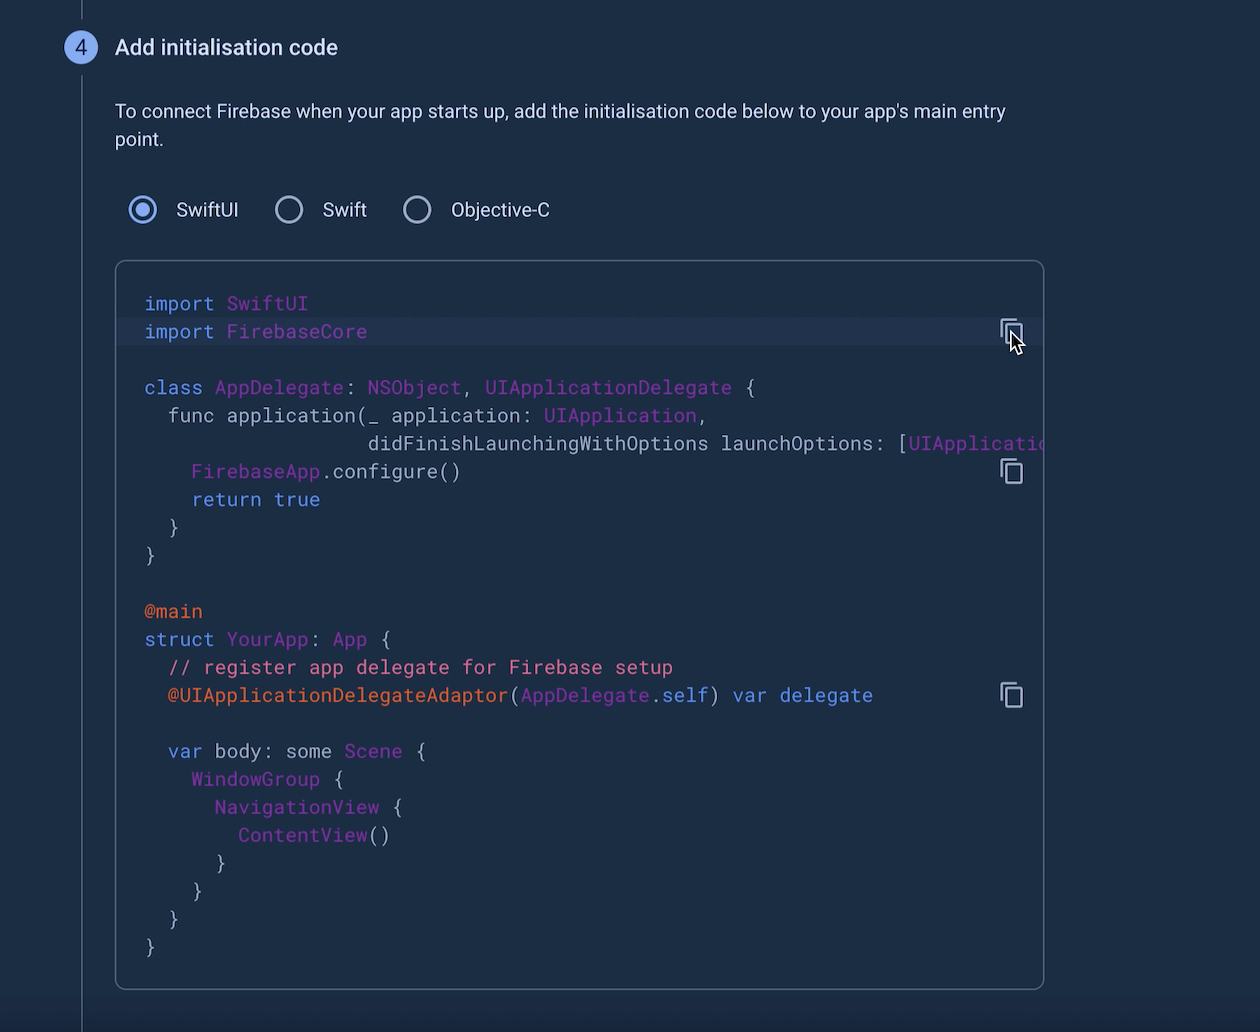
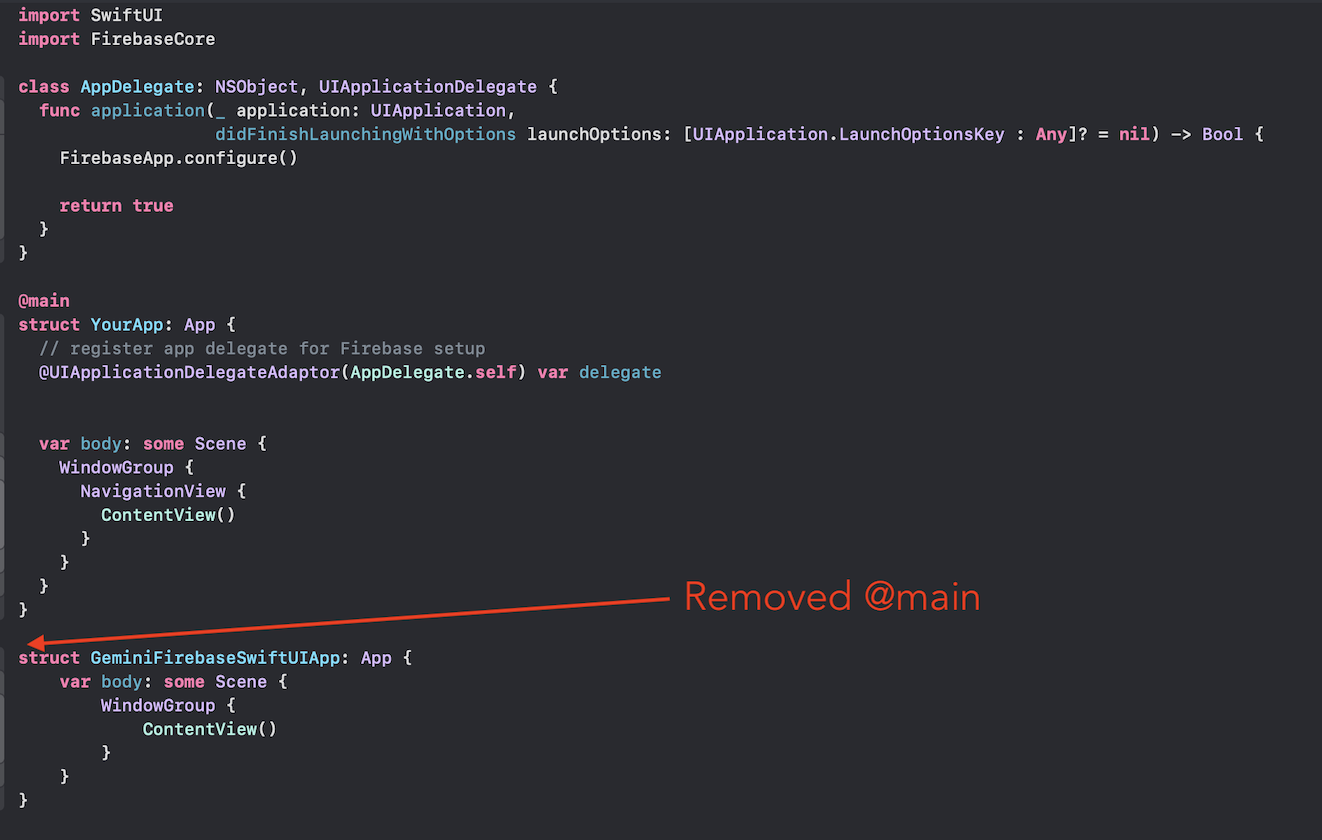
- Copy the code snippet as you see & add it your Xcode project’s App.swift file. Remember to remove the
@mainattribute from the defaultAppstruct
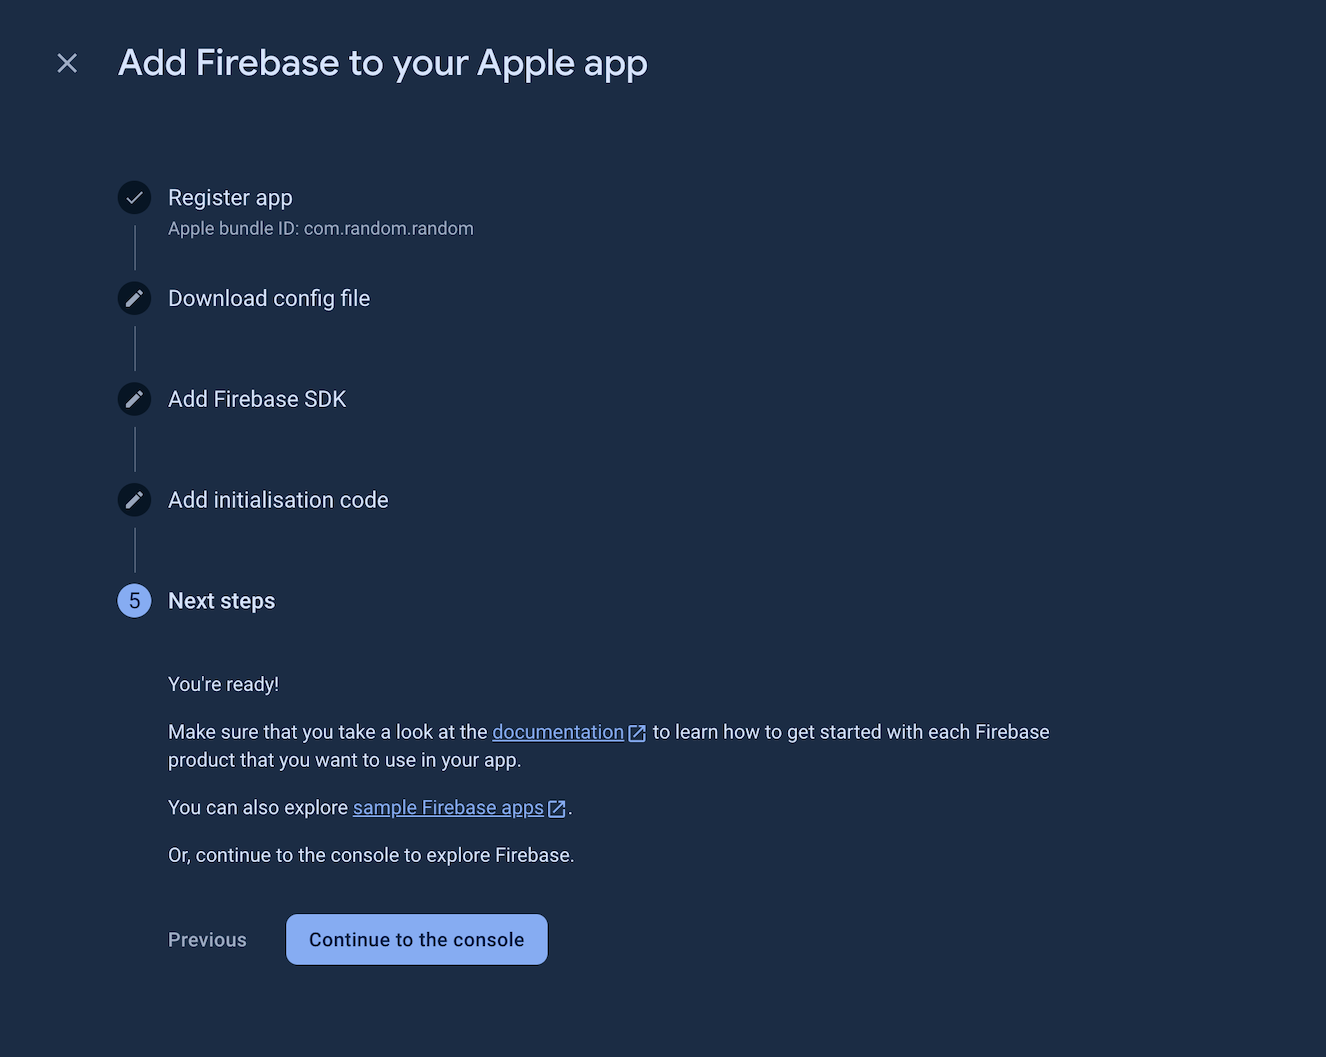
- Go back to the Firebase console, Click
Next& then clickContinue to Console
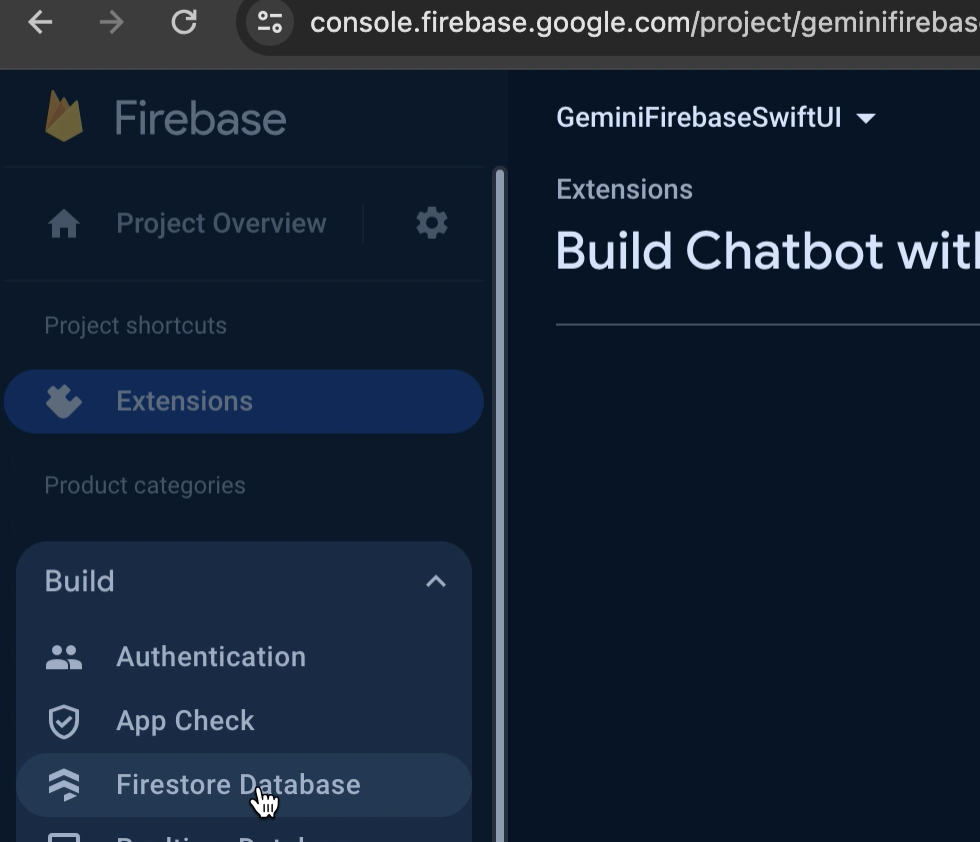
- In the console, you will see your
Project Overview. Click theBuildoption in the side menu to expand it, then click onFirestore Database
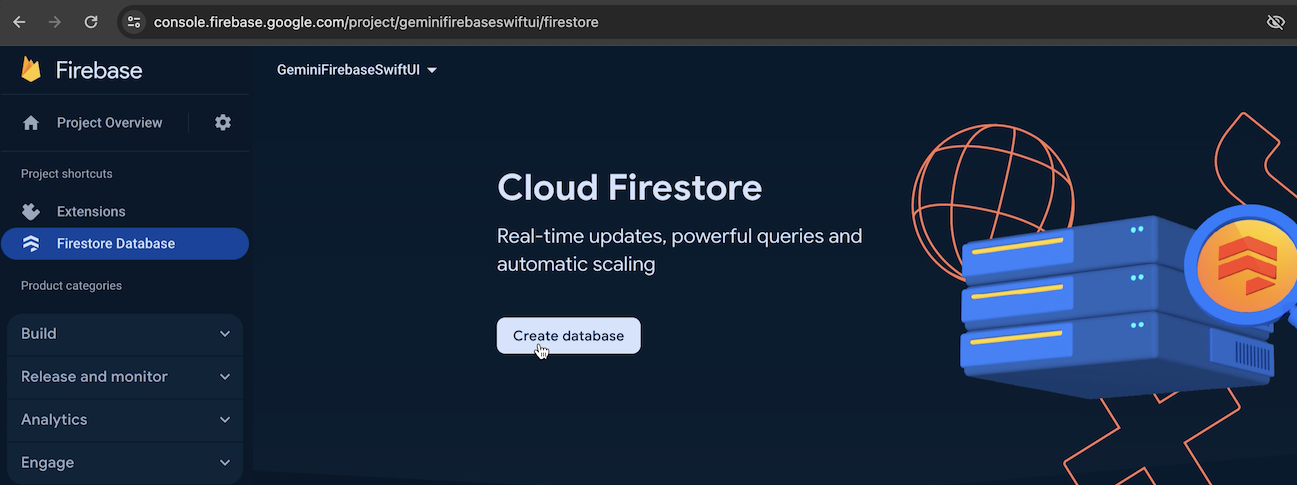
- Once the pane loads, click on
Create database, leave theDatabase IDto default & choose a location nearest to you from theLocationdropdown. Note that this cannot be changed later. ClickNext.
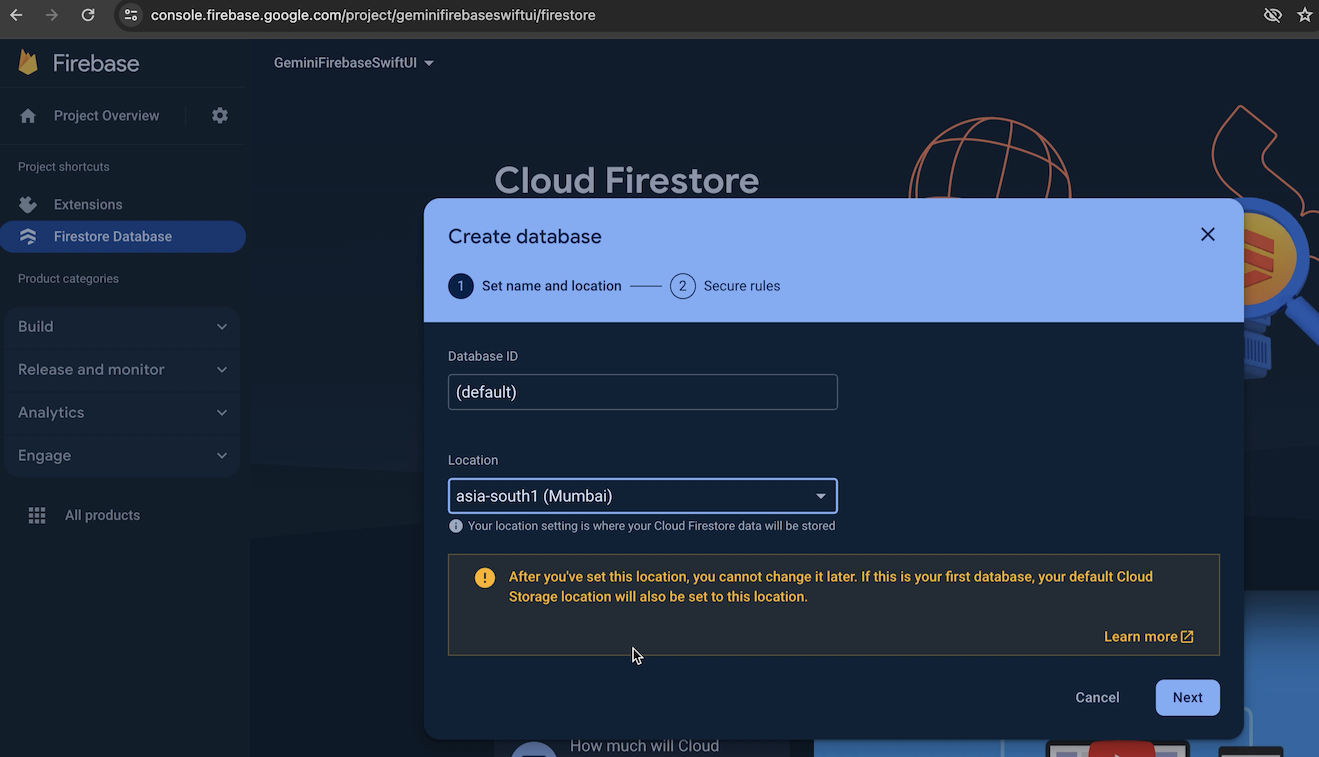
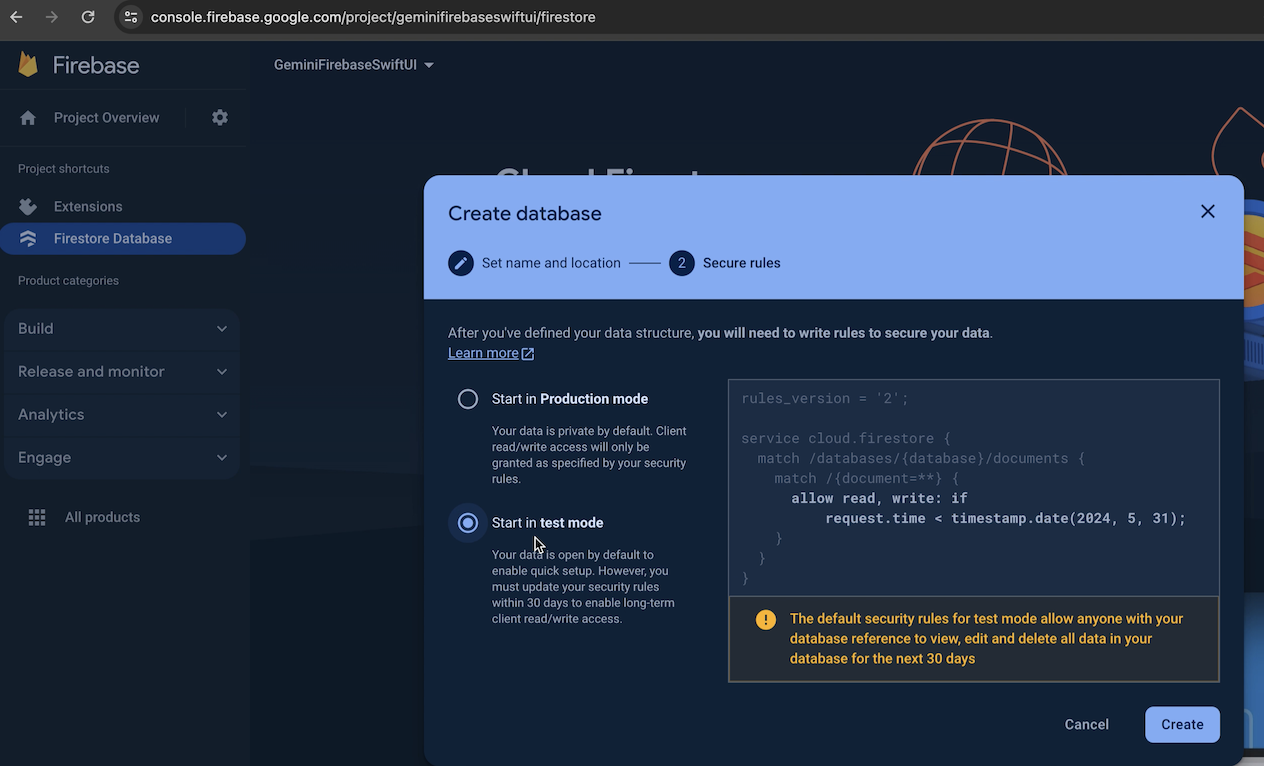
- Select
Start in test modein the next step, then clickCreate. Starting in test mode helps you read/write to the Firestore DB quickly with relaxed security rules. It is advised that you later setup auth rules to prevent misuse or malicious access to the Firestore DB.
- Setting up the Firestore DB will take a few seconds, after which you will see the
Datapanel. You have now setup the Firestore DB successfully.

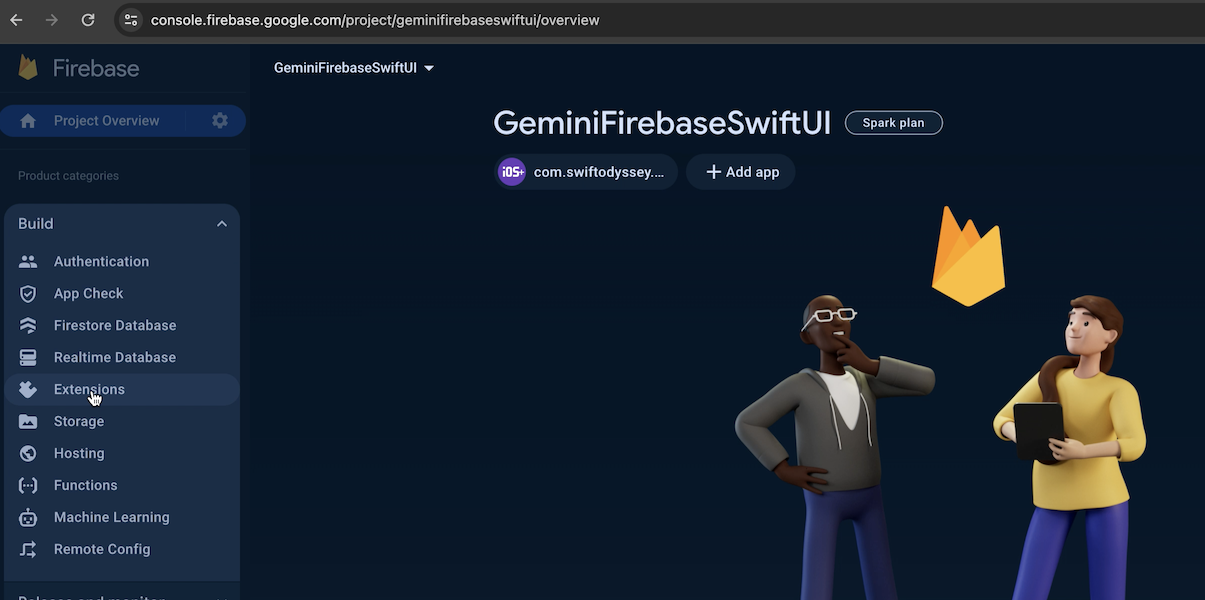
- Click the
Buildoption in the side menu to expand it, then click onExtensions
- The Extensions pane will load & you will see the
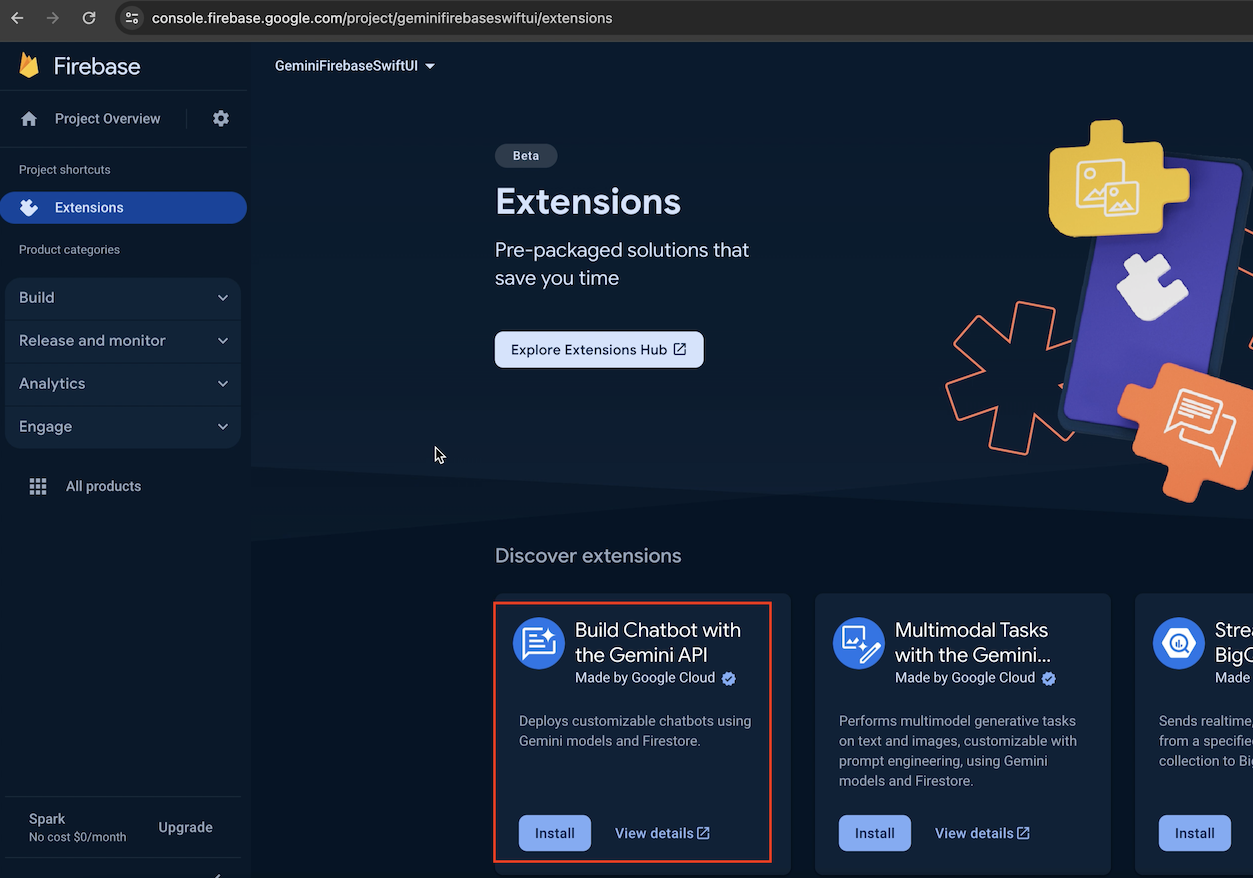
Build Chatbot with the Gemini APIextension option. Click onInstall. If you don’t see the extension here, click onExplore Extensions Hub& search for the extension there.
- On the next screen in the
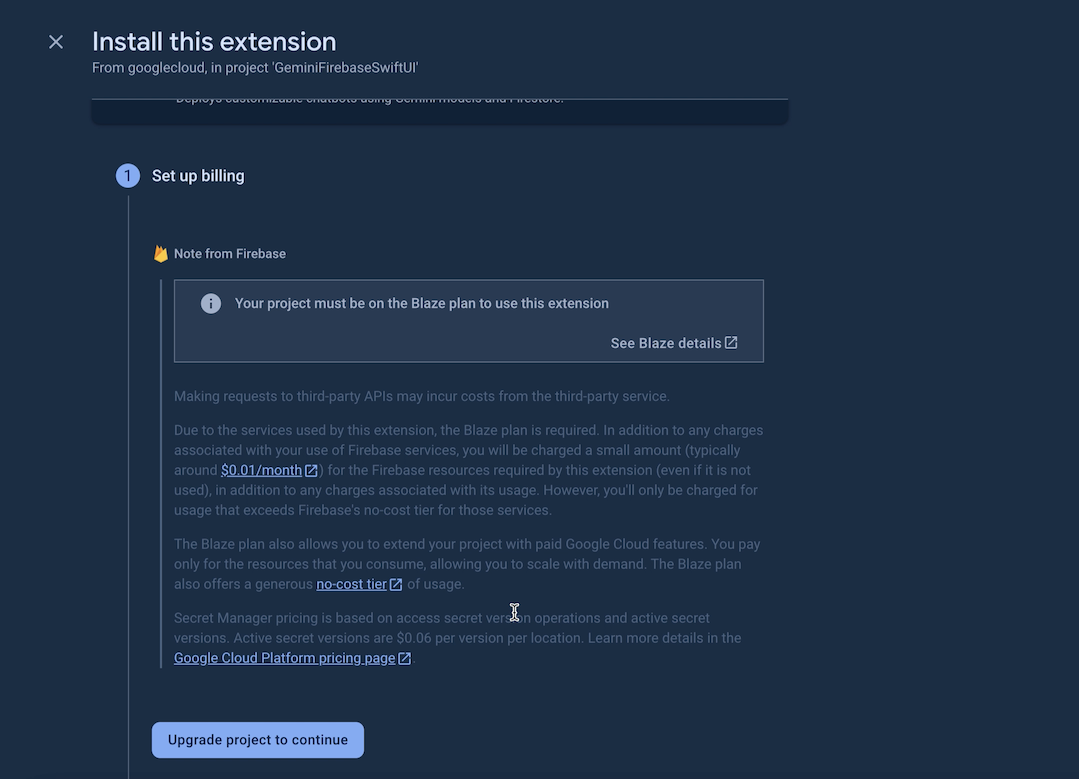
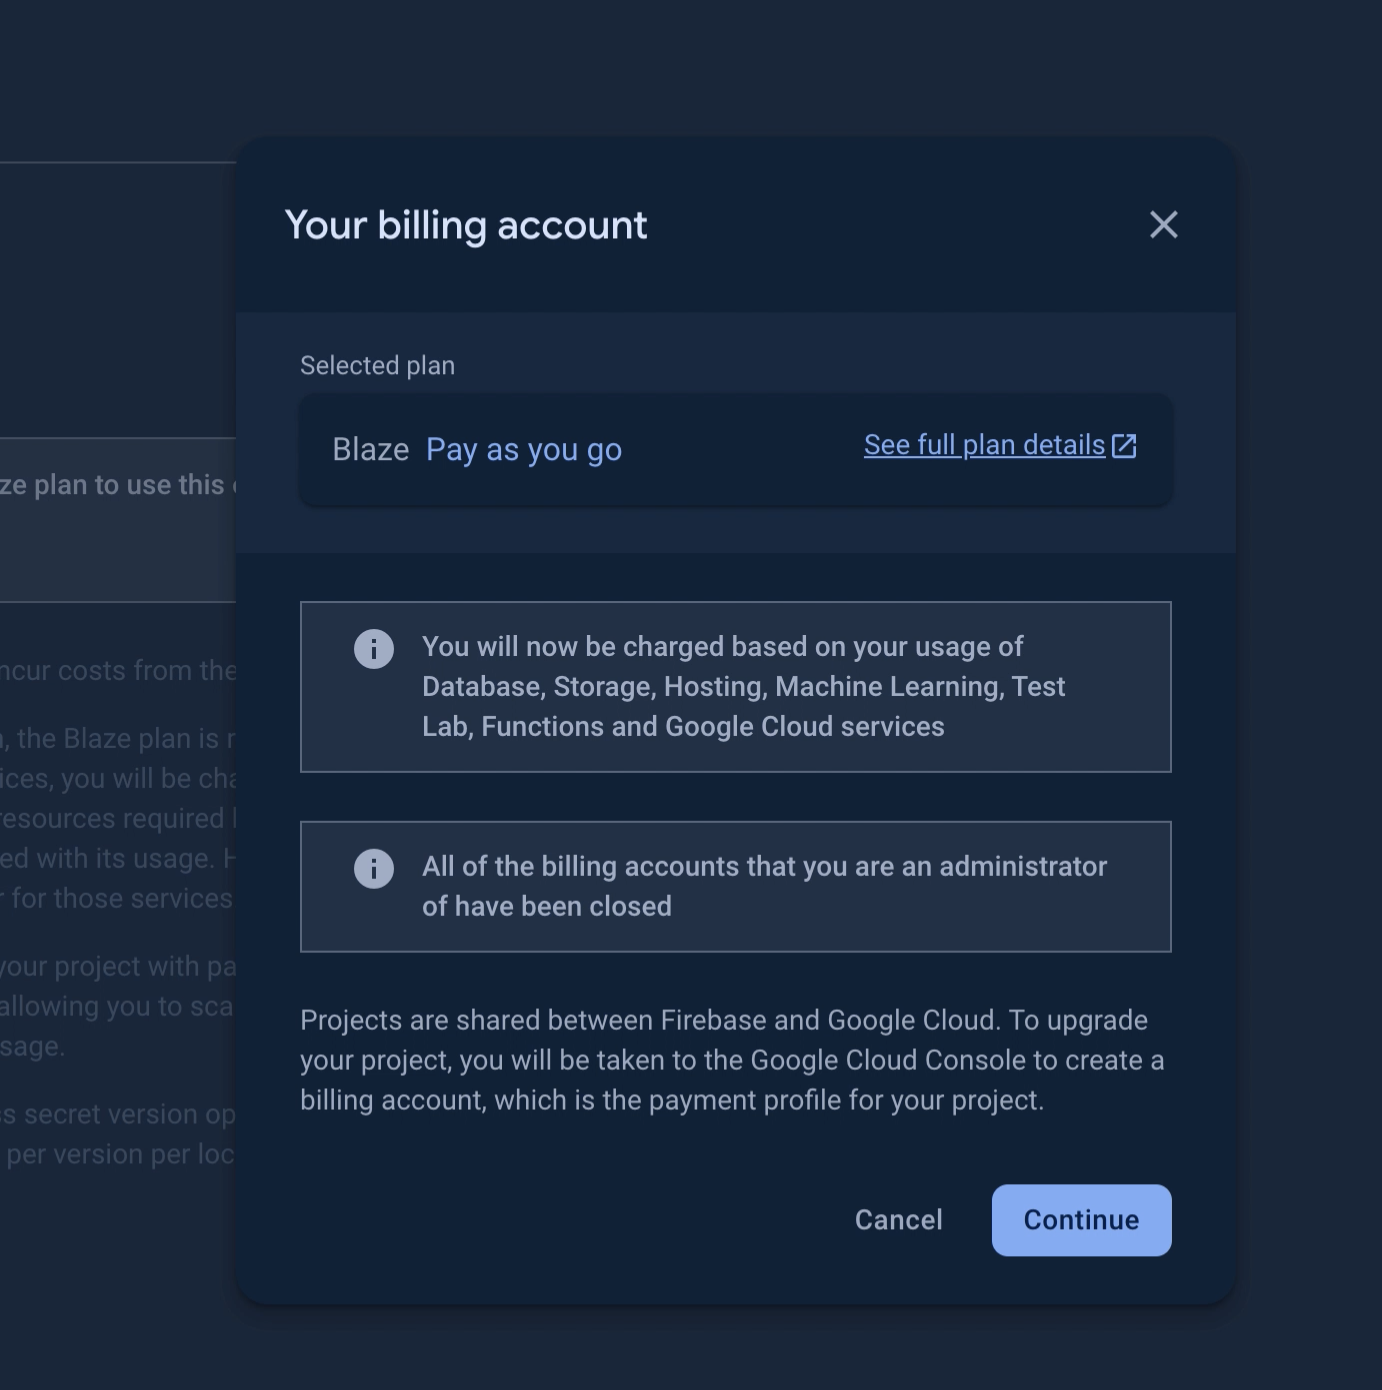
Set up billingstep, scroll to find theUpgrade project to continueoption.
- Select
Continuein the popup dialog that appears.
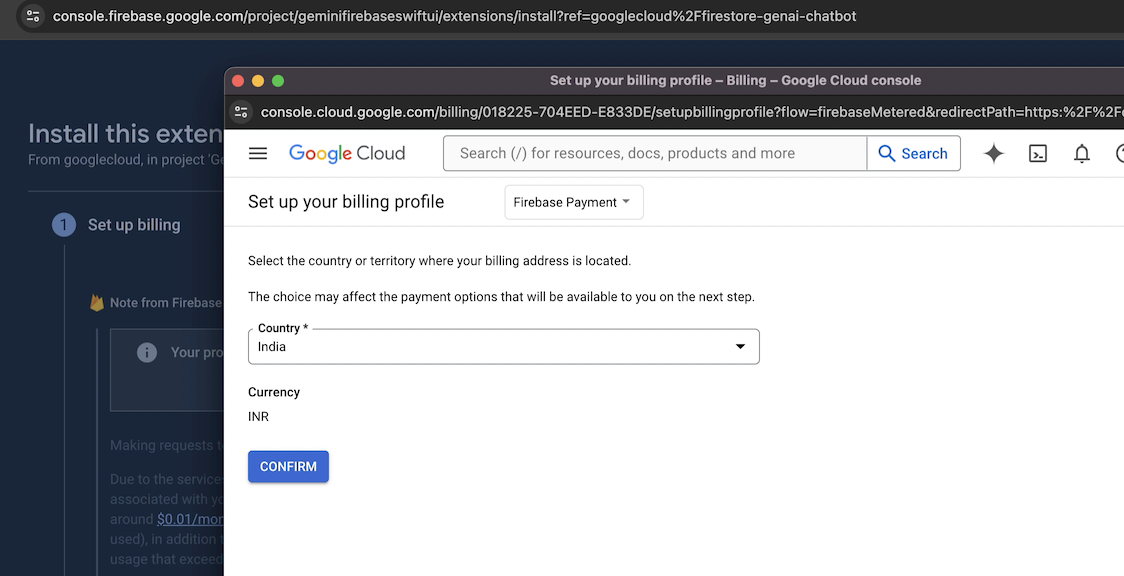
- In the billing screen that appears next, confirm your
Country&Currencythen clickCONFIRM
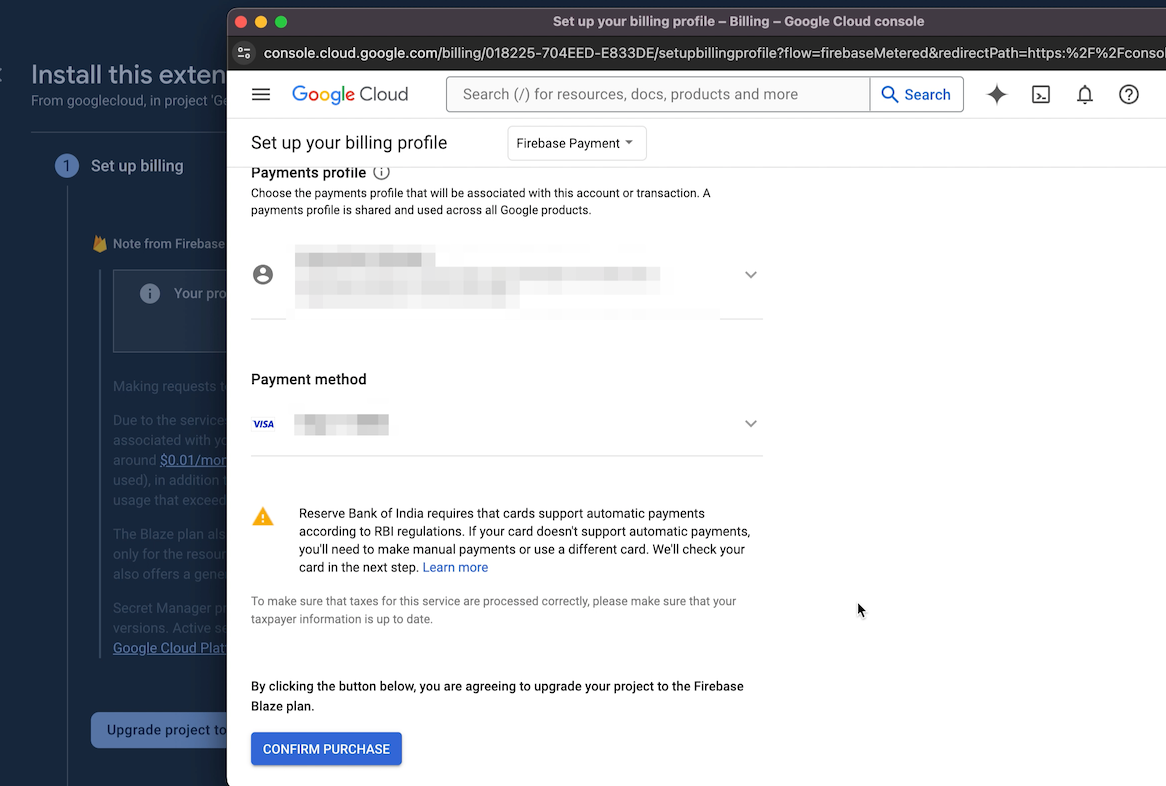
- You will be presented with your Payment profile & payment method. Set these up if you haven’t done them before, then click
CONFIRM PURCHASE
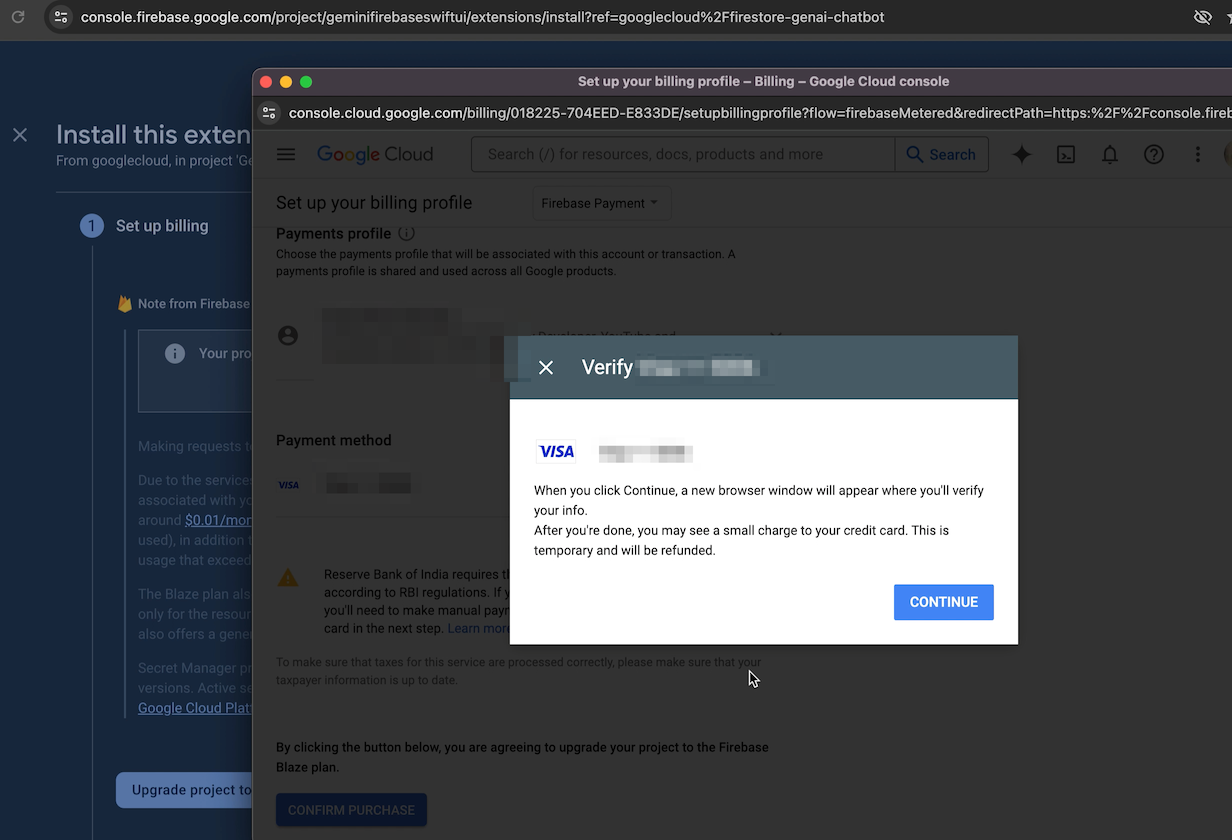
- Click
CONTINUEwhen presented with your chosen payment option. You will be charged a small fee for verification (₹2 for residents of India)
- Payment confirmation should happen quickly & you should be taken back to the
Install Extensionscreen with your billing account detail shown. If you have multiple billing accounts, select the one you want to use from the dropdown, then clickContinue. If for some reason you dont see it, just click on theUpgrade project to continueoption again.
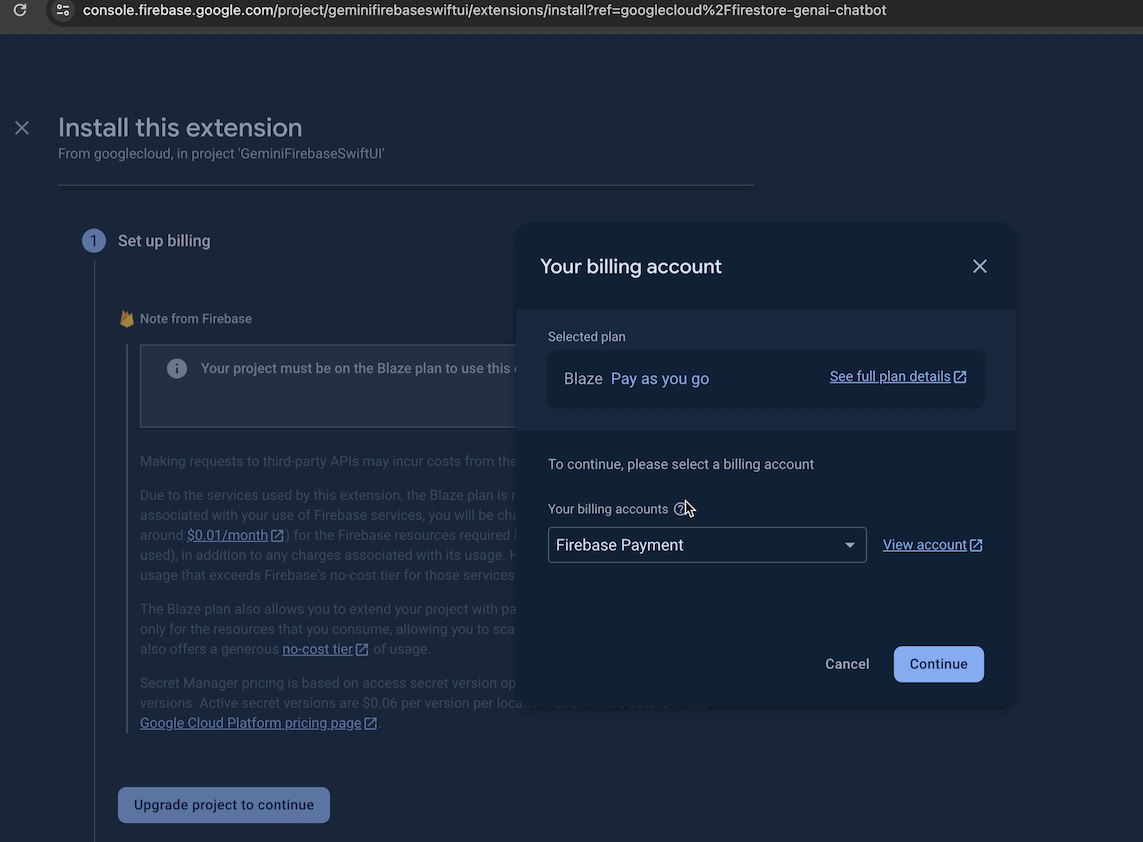
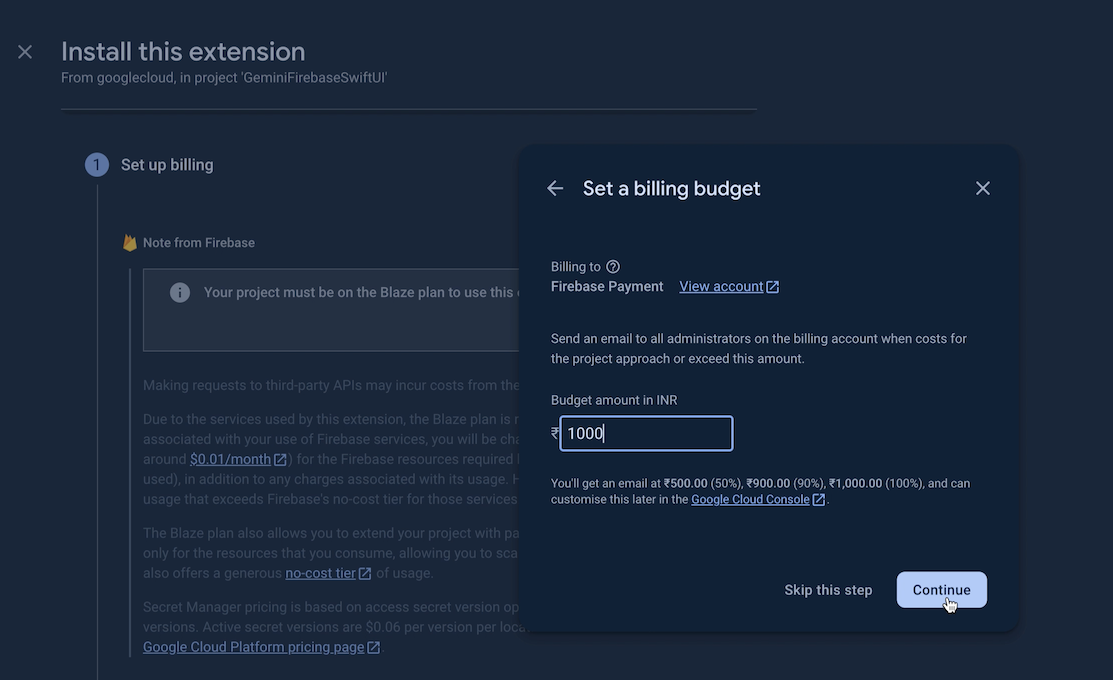
- Next, set a budget amount & click
Continue. This is because the firebase extension runs in the cloud for which you are charged a very small fee. This budget helps you make requests to the Gemini API. Note that Google will notify you on 50, 90 & 100% utilisation of the budget. You can customise this later.
- Confirm your purchase by clicking on
Purchasein the next step.

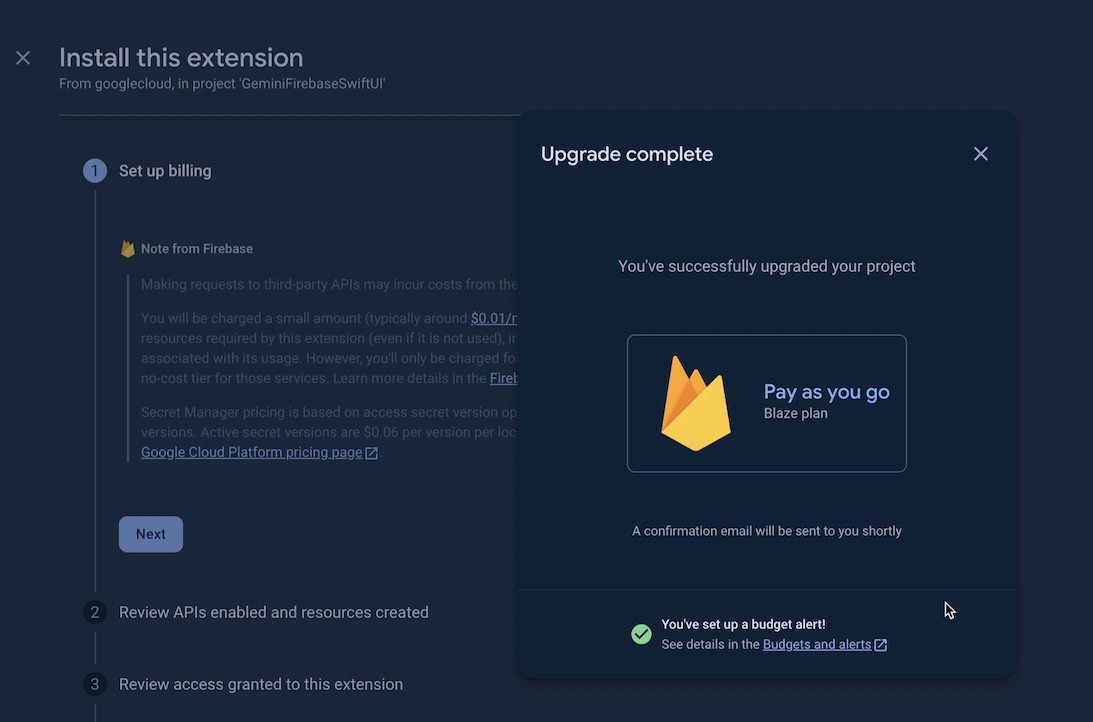
- You should see this on successfully upgrading your project. Close the dialog to proceed.
-
In the
Review APIs enabled and resources createdstep, take a look around. The extension enables the Vertex AI API for access to the Vertex AI Gemini API, creates Cloud functions to listen to Firestore DB data changes as well as generate conversations & also enables the Cloud Secret Manager to discreetly use the Google AI API Key in your requests. Previously with the Gemini Swift SDK, you’d have had to create a secret key in app studio & manage passing it in Gemini API requests manually. Here, the extension does it for you automatically! -
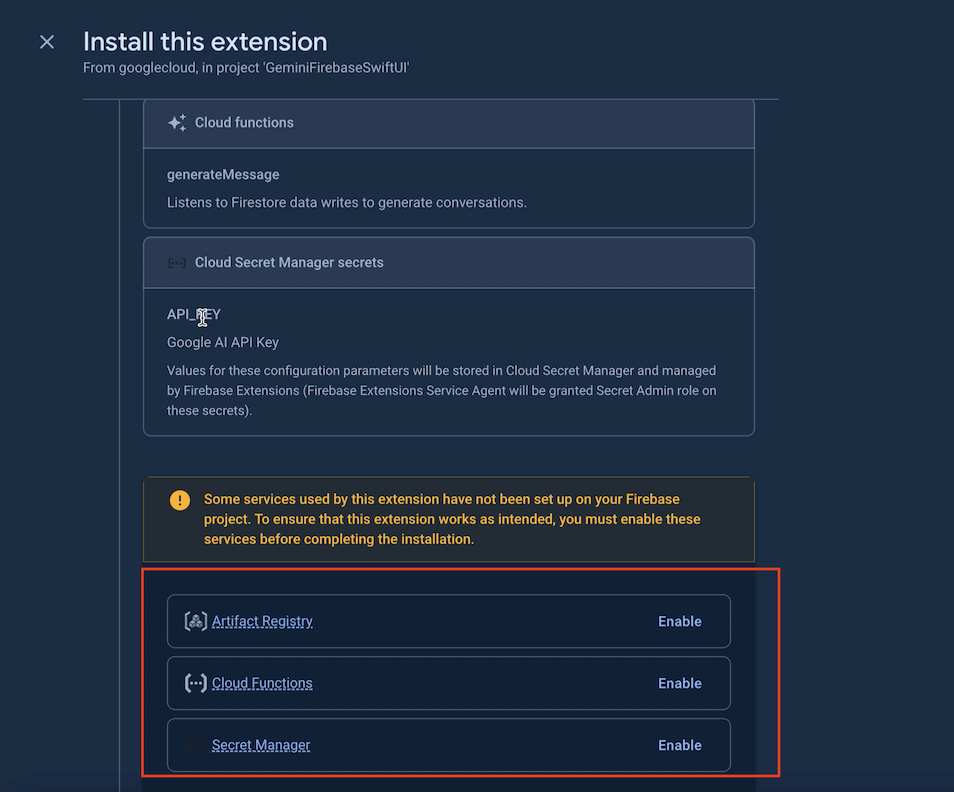
Scroll & enable the
Artifact Registry,Cloud Functions&Secret Managerservices.
- Next, in the
Review access granted to this extensionstep, review the descriptions of what the service account created for your project has access to. Then clickNext
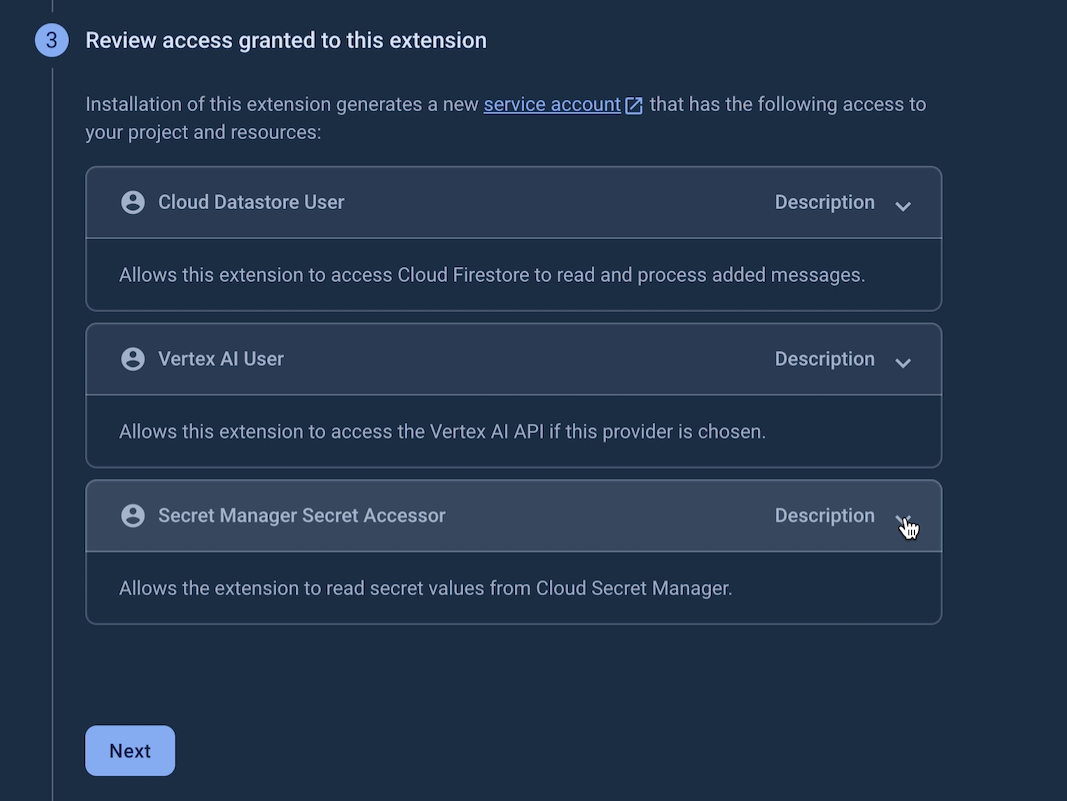


- In the
Configure extensionstep, change the Gemini API Provider fromGoogle AItoVertex AI. If you chooseGoogle AI, you will need to enter the Gemini API secret key in the next field. The next few fields show the Gemini model that will be used i.e.gemini-pro, the Firestore collection path i.e.generate& theprompt&responsefields. The collection path is the Firestore database path where all chats will be stored asdocuments, while theprompt&responsefields will hold the messages sent to & responses received from the Gemini API. You will see these over the next few steps. You can change the collection path to something else, saychat. Just remember it though as we will need it in the iOS app.

- Select a location closest to you in the
Cloud Functions locationdropdown. Note that this cannot be changed later so choose wisely.
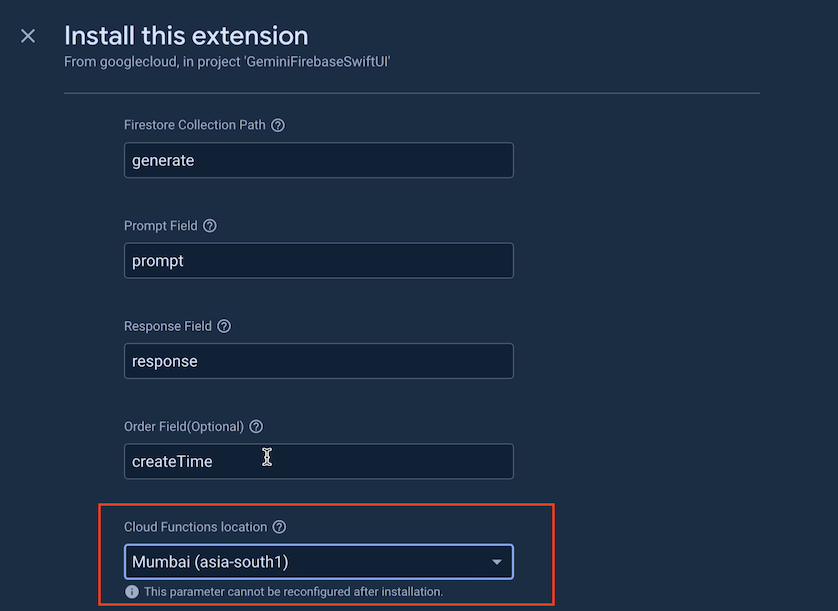
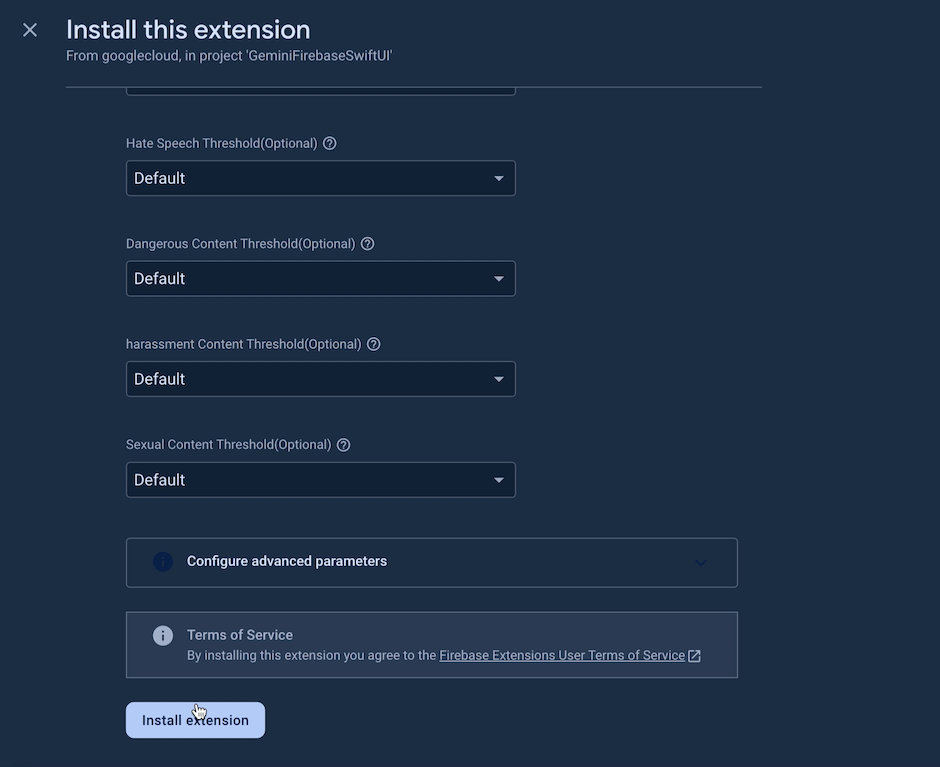
- Review the descriptions of the other optional fields, such as Order Field (used for ordering conversation history), Context (a string providing context for the conversation), Temperature (controls the randomness of the AI response), Hate Speech, Dangerous Content, Sexual Content thresholds etc. by clicking on the (?) icon. Leave these at their default values for now. Scroll to the end & click
Install extension.
- You will see the chatbot extension installing, this may take a few mins.
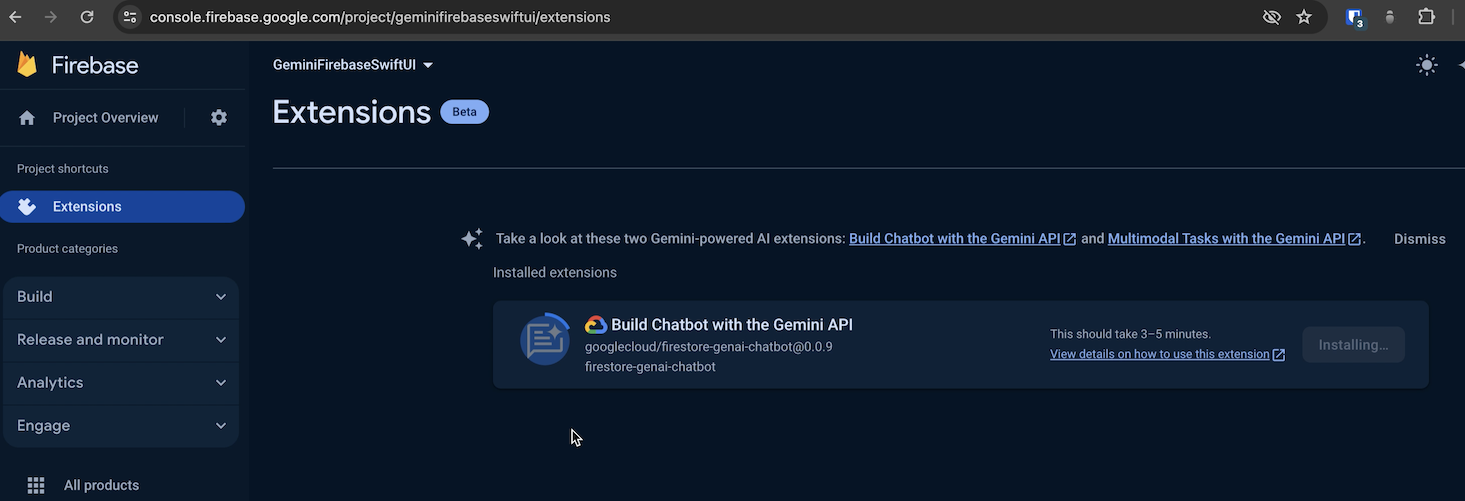
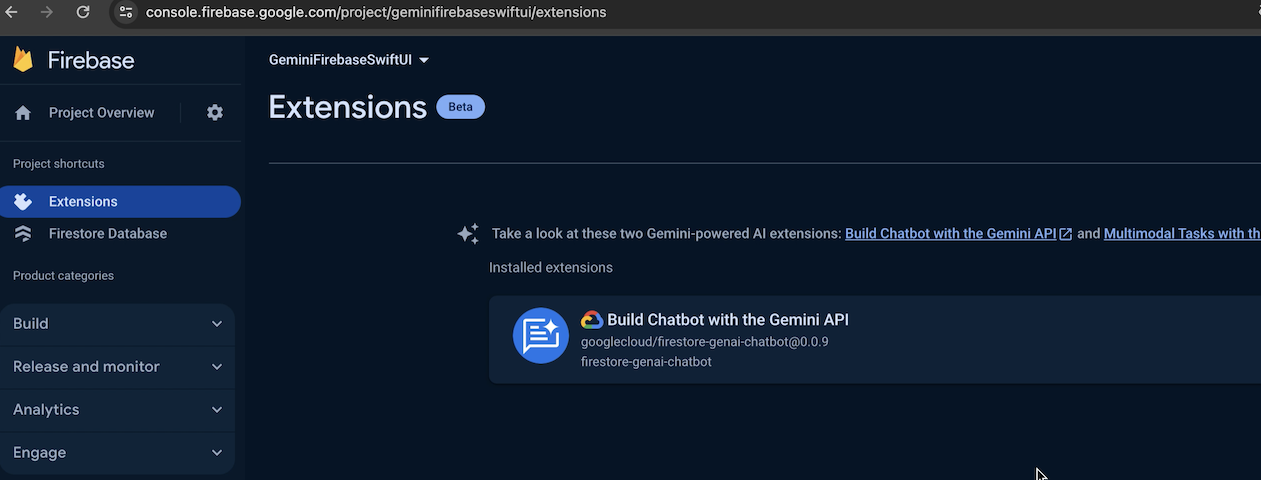
- Go back to the
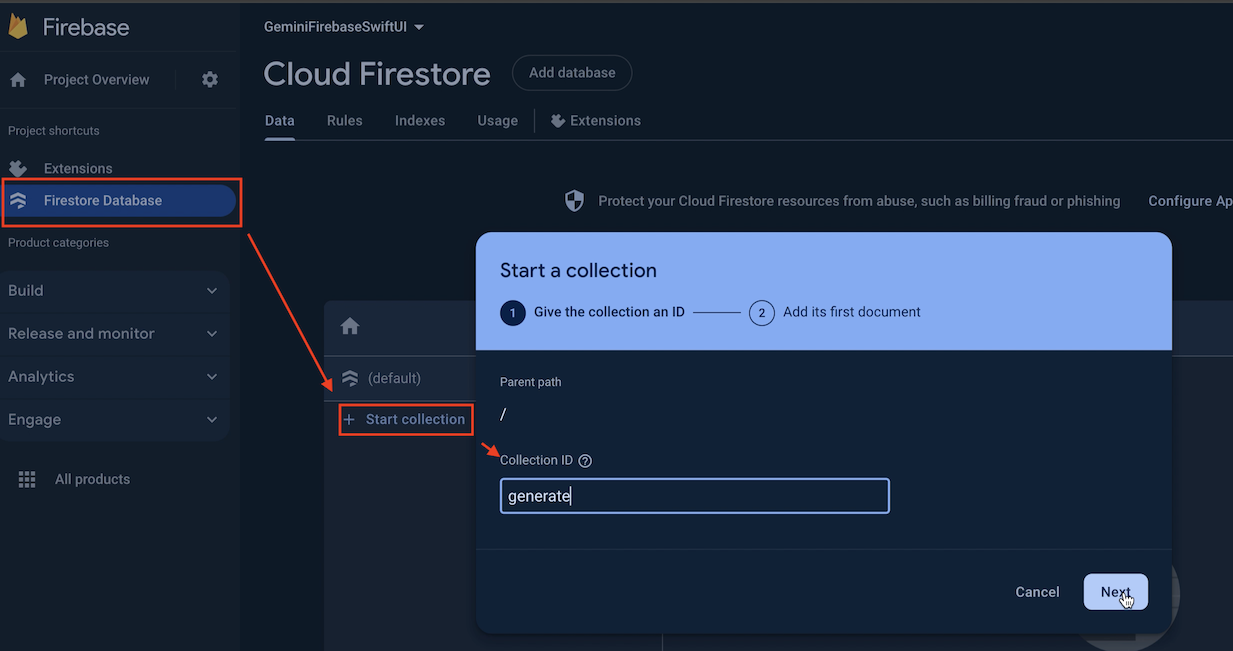
Buildoption from the side menu & chooseFirestore Database. Then click on+ Start Collection. ForCollection ID, enter the Firestore collection path i.e.generate. If you changed this in the previous steps while enabling the extension, enter that path here. ClickNext
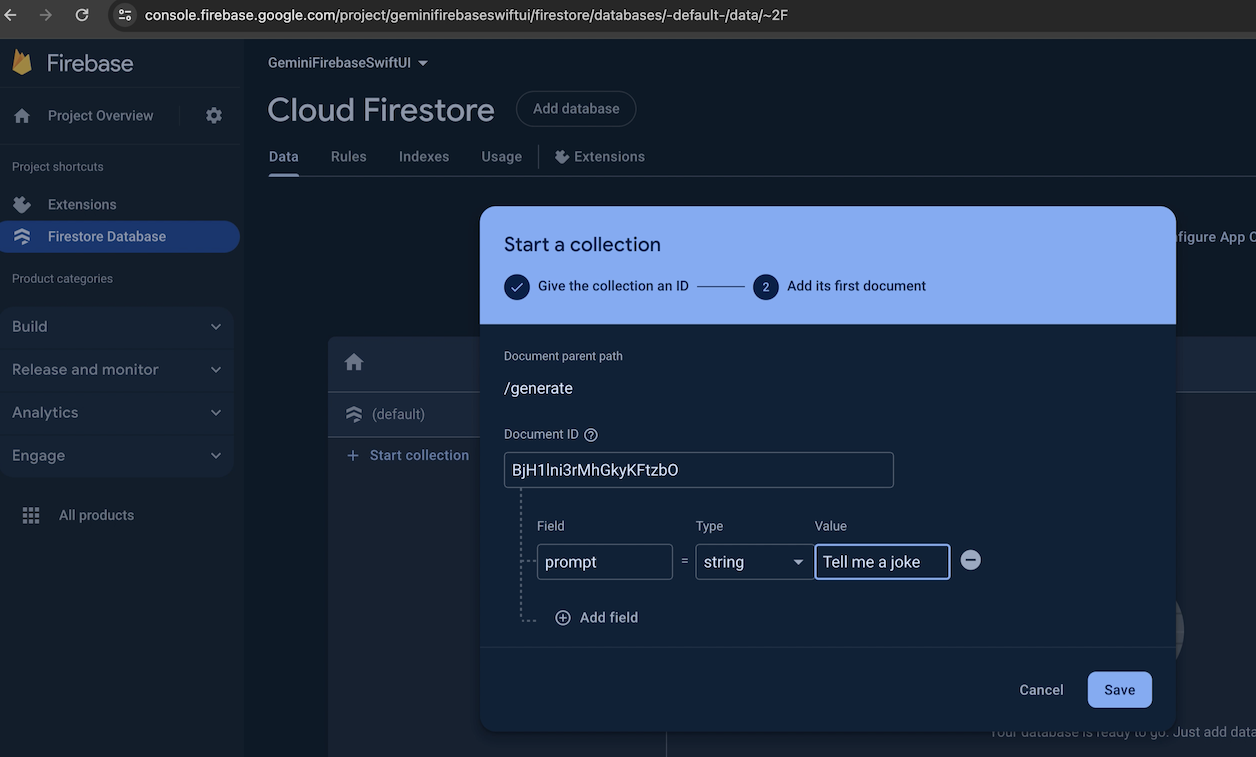
- In the next pane, select
Auto-IDforDocument ID, enterpromptfor theField, keep the type as String & enter a prompt string such asTell me a jokein theValuefield. ClickSave. This will create a new document/chat message with the prompt sent to Gemini API.
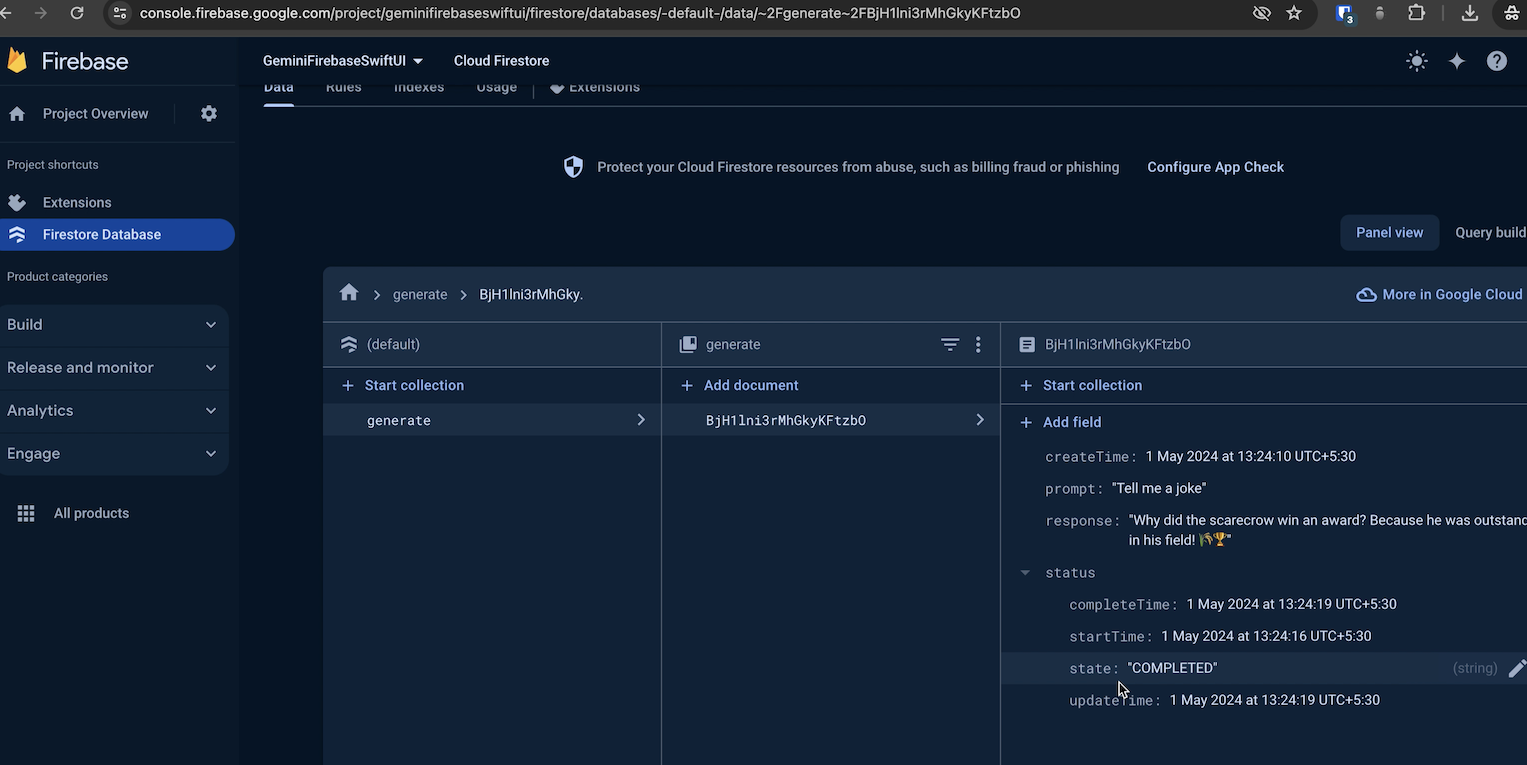
- Within a few seconds you should see the
promptprocessing complete & a response returned from the Gemini API, stored in the DB.
This concludes setting up of the extension. Let’s build the client iOS app now.
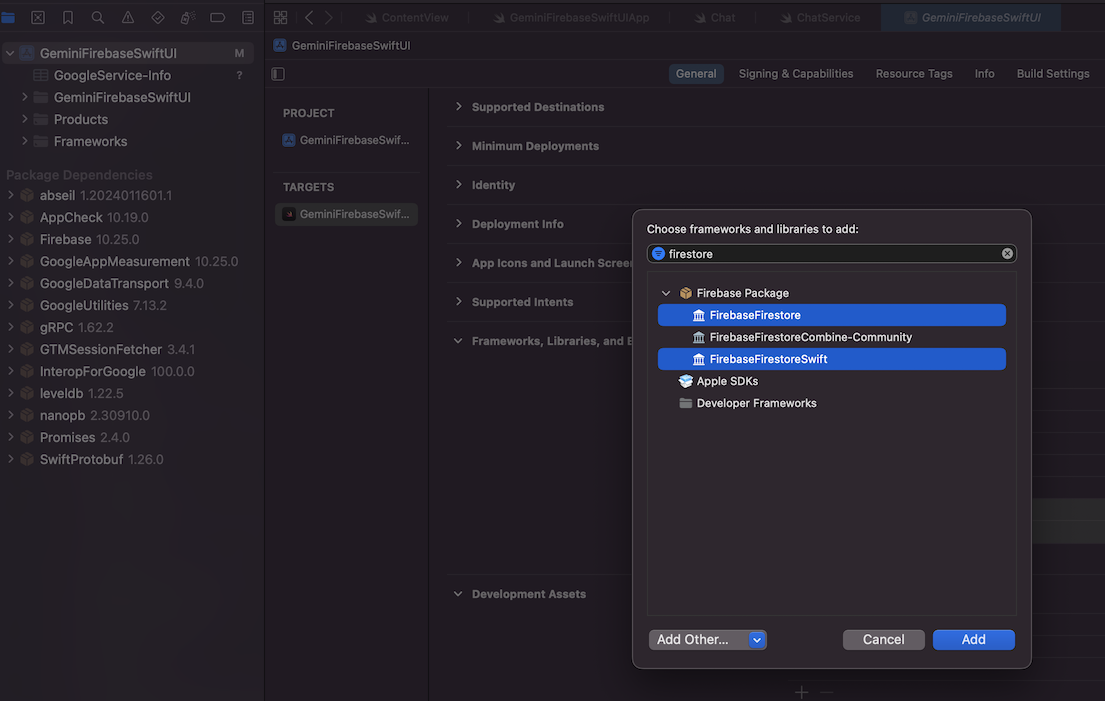
- Go to your Xcode project’s Target settings & add the
FirebaseFirestore&FirebaseFirestoreSwiftframeworks in theFrameworks, Libraries, and Embedded Contentsection.
As we’ve seen in previous tutorials we create a simple UI with a scrolling list to display the chat conversation with a text field at the bottom to send messages to Gemini.
// MARK: Chat list view
@ViewBuilder private func chatListView() -> some View {
    ScrollViewReader(content: { proxy in
        ScrollView {
            ForEach(chatService.messages, id: \.self) { chatMessage in
                chatMessageView(chatMessage)
                    .id(chatMessage.id)
            }
        }
        .onChange(of: chatService.messages) { oldValue, newValue in
            guard let recentMessage = chatService.messages.last else { return }
            DispatchQueue.main.async {
                withAnimation {
                    proxy.scrollTo(recentMessage.id, anchor: .bottom)
                }
            }
        }
    })
}

// MARK: Input view
@ViewBuilder private func inputView() -> some View {
    HStack {
        TextField("Enter a message...", text: $textInput)
            .textFieldStyle(.roundedBorder)
            .foregroundStyle(.black)
        Button(action: sendMessage, label: {
            Image(systemName: "paperplane.fill")
        })
    }
}

// MARK: Chat message view
@ViewBuilder private func chatMessageView(_ chat: Chat) -> some View {
    ChatBubble(direction: chat.isUser ? .right : .left) {
        Text(chat.message)
            .font(.title3)
            .padding(.all, 20)
            .foregroundStyle(.white)
            .background {
                chat.isUser ? Color.blue : Color.green
            }
    }
}

// MARK: Send message
private func sendMessage() {
    chatService.sendMessage(textInput)
    textInput = ""
}
In order to send & receive messages from the Gemini API, we create an Observable ChatService class that does the heavy lifting. We first create a ChatDocument to map the document/chat from the Firestore DB as follows:
struct ChatDocument: Codable {
    let createTime: Timestamp
    let prompt: String
    let response: String?
    let status: Status

    struct Status: Codable {
        let startTime: Timestamp?
        let completeTime: Timestamp?
        let updateTime: Timestamp
        let state: String
        let error: String?

        var chatState: ChatState {
            return ChatState(rawValue: state) ?? .PROCESSING
        }
    }
}
If you recall, the properties you see above (apart from chatState) are the fields that appear in the Firestore DB for each document/chat. Note the prompt & response properties here which map to the prompt & response fields in the FIrestore DB. We then construct our ChatService class like so:
import FirebaseFirestore
import FirebaseFirestoreSwift

@Observable class ChatService {
    private(set) var messages: [Chat] = []
    private var db = Firestore.firestore()
    private let collectionPath = "generate"

    func fetchMessages() {
        db.collection(collectionPath)
            .order(by: "createTime", descending: false)
            .addSnapshotListener { [weak self] querySnapshot, error in
                guard let self else { return }
                guard let documents = querySnapshot?.documents else {
                    print("No documents found")
                    return
                }

                messages = documents.compactMap { snapshot -> [Chat]? in
                    do {
                        let document = try snapshot.data(as: ChatDocument.self)
                        let prompt = Chat(text: document.prompt, isUser: true, state: .COMPLETED)
                        let response = Chat(text: document.response ?? "", isUser: false, state: document.status.chatState)
                        return [prompt, response]
                    } catch {
                        print(error.localizedDescription)
                        return nil
                    }
                }.flatMap { $0 }
            }
    }

    func sendMessage(_ message: String) {
        let placeholderMessages = [Chat(text: message, isUser: true, state: .COMPLETED), Chat(text: "", isUser: false)]
        messages.append(contentsOf: placeholderMessages)
        db.collection(collectionPath).addDocument(data: ["prompt": message])
    }
}
In the fetchMessages() function, we create a Snapshot Listener to continually monitor the Firestore DB we created above for changes at the collectionPath, ordered by the createTime field. We then decode each document/chat from the snapshot into our decodable ChatDocument. Finally we create 2 Chat instances, one for the user’s input & one for the AI while we wait for the response. To send a message to the API, we call the sendMessage() function where we add a new document at the given collection path via the prompt field.
struct Chat: Hashable {
    private(set) var id: UUID = .init()
    var text: String?
    var isUser: Bool
    var state: ChatState = .PROCESSING
    var message: String {
        switch state {
        case .COMPLETED:
            return text ?? ""
        case .ERROR:
            return "Something went wrong. Please try again."
        case .PROCESSING:
            return "..."
        }
    }
}
Run the app & the chat service will fetch any existing chats from the Firestore DB, always keeping it in sync as you send messages from the iOS app.

As you’ve seen by now, it’s not that hard to setup a chatbot on iOS thanks to the firebase extension. What I particularly love about this is the chat storage that you get along with chat context that persists for quite some time. The extension should unlock a lot of possiblities especially if you love Gemini & Firebase.
And that’s it for this post! The complete code can be found here
Leave a comment if you have any questions!
Resources:
- https://extensions.dev/extensions/googlecloud/firestore-genai-chatbot
- https://ai.google.dev/gemini-api/docs/firebase-extensions
- Firebase after hours on YT
